Fish Pose

Fish Pose: Step-by-Step Instructions
Fish Pose, also known as Matsyasana, teaches you how to float more easily in water by greatly improving your chest expansion.
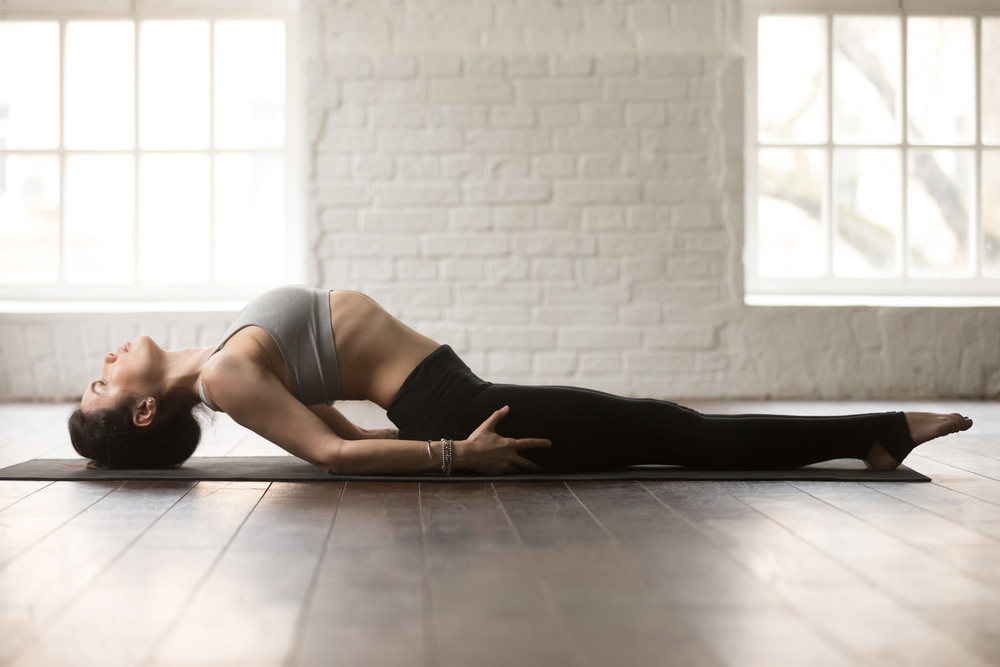
Matsyasana
(Pronounced as "mutt-SYAHS-anna")
| Detail | Description |
|---|---|
| Sanskrit Name | Matsyasana |
| Meaning | "Matsya" means "great fish" in Sanskrit |
| Origin Story | Refers to the enormous fish that saved King Manu, his family, the sages, and the Vedas during a massive flood |
Matsya means "great fish" in Sanskrit, and it refers to the story of an enormous fish that saved the Indian King Manu, his family, the sages, and the Vedas during a massive flood.
How to Do Fish Pose
| Step | Key Action |
|---|---|
| Step 1 | Sit in Lotus, Half-Lotus, or with knees bent; lie back on mat |
| Step 2 | Exhale, arch back, lift chest and neck, rest crown of head on floor |
| Step 3 | Activate legs and lift from chest; press tailbone or hips into floor |
| Step 4 | Hold for 15 seconds to 1 minute; release on exhalation |
Step One:
Sit in Lotus Pose, also known as Padmasana. To protect your knee joints, try to hold Lotus Pose without pointing your toes. It is better to lift your ankles so that they rest on top of your thighs with your heels extended.
If you cannot sit in Lotus posture, you can sit in Half-Lotus Pose by placing only your right ankle on top of your left thigh, keeping your other ankle beneath your left thigh on the mat.
Now for those sitting in Lotus or Half-Lotus Pose, go ahead and lie back on your yoga mat by using your hands to ease your way down. Keep pressing your legs down into the floor.
If Half-Lotus posture is also too difficult for you right now, lie back on your yoga mat while keeping your knees bent and the soles of your feet on the floor.
Here you should raise your pelvis to slide your hands under your buttocks with palms facing down. Your buttocks will rest on your hands. Keep your arms close to your sides. Extend both legs straight in front of you.
Step Two:
Regardless of your leg position, everyone should take a deep breath. As you exhale, arch your back fully by lifting up your chest and then your neck. This way, you should easily be able to rest the crown of your head on the floor.
For those of you in Lotus or Half-Lotus, you can increase the arch in your back by holding your crossed legs with your hands and pulling against them to expand your chest further.
Step Three:
For those with their legs extended straight, point your toes to keep your thighs active as you press your tailbone firmly down into the floor and continue lifting from your chest.
Those in Lotus or Half-Lotus should practice sinking their hips down into the floor and lifting up fully from their navels all the way up through their necks.
Step Four:
Hold this position for 15 seconds, or up to a minute if you can. Take a breath and lower your torso back down to the floor on a long exhalation. Then release your legs and relax.
Beginner's Tip:
People often push too hard on their necks to compensate for the lack of a complete back arch. Until your back becomes more flexible, place a thick, rolled-up yoga blanket underneath the back of your neck to relieve this strain.
Fish Pose Information
| Detail | Description |
|---|---|
| Sanskrit Name | Matsyasana |
| Pose Level | Level 2 (Intermediate) |
| Primary Focus | Deep backbend, chest opener |
| Key Cautions | Irregular blood pressure, lower-back or neck injuries, knee conditions |
Sanskrit Name:
Matsyasana
Pose Level:
Level 2
Contraindications and Cautions:
Irregular blood pressure
Recent lower-back or neck injuries
Migraine or insomnia (avoid holding for extended periods)
For knee conditions: Practice the version of this pose where you keep your legs straight.
Modifications and Props:
If you have difficulty opening the chest into this deep backbend, use a bolster. Lie down on top of the bolster so that it supports your spine all the way from your sacrum up to the bottom of your neck.
Your head should extend over the rounded edge of the bolster and hang down so that the top of your head touches the floor. Keep the end of your tailbone on the floor.
Deepen the Pose:
To push yourself further in this posture, stretch both of your arms up over your head and grab your elbows. Press your forearms into the floor as you hold your elbows and focus on opening your shoulders up even more.
Therapeutic Applications:
Promotes healing of the thyroid glands
Reduces inflammation due to piles or constipation
Expands the lungs to improve breathing capacity
Relaxes the nervous system and helps reduce stress
Reduces menstrual pain
May help alleviate mild fatigue and anxiety
Fish Pose Benefits
| Benefit | Description |
|---|---|
| Hip Flexibility | Loosens pelvic joints for greater range of motion |
| Rib and Chest Release | Stretches tension in the intercostal muscles between ribs |
| Shoulder Mobility | Increases freedom of movement in the shoulders |
| Posture Improvement | Retrains slouching shoulders for better alignment |
| Spinal Health | Strengthens the upper back and improves spinal flexibility |
Loosens pelvic joints for more hip flexibility
Stretches tension in the muscles between your ribs
Provides greater freedom of movement to the shoulders
Retrains slouching shoulders for better posture
Strengthens the upper back and improves spinal flexibility
Fish Pose Variations
| Variation | Best For |
|---|---|
| Cross-legged (Swastikasana) | Beginners building hip flexibility |
| Legs extended straight | Those with knee conditions |
| Half-Lotus | Intermediate practitioners progressing toward full Lotus |
| With yoga block under upper back | Deepening the chest opening with partner support |
To help you gradually build more flexibility to perform this pose with your legs in Lotus position, start by sitting in the easy cross-legged posture, or Swastikasana. Here your right ankle is under your left thigh, and your left ankle is under your right knee.
Then lean back and practice the rest of Fish Pose as described above. This way, you start to loosen your thighs and hips. After you come out, remember to repeat this pose again while crossing your legs the other way.
Partnering:
After you get into this posture, ask a partner to sit behind you. Have them use their hands to adjust your shoulders. Their thumbs should press your scapulas up into your back, and they can pull the outer edges of your shoulders down to the floor.
If you are comfortable with a deeper stretch, you can also ask them to help slide a yoga block underneath your upper back so that your shoulder blades alone rest on it, elevating them only 2 inches above the floor. Do not turn the yoga block to get higher than 2 inches from the floor.