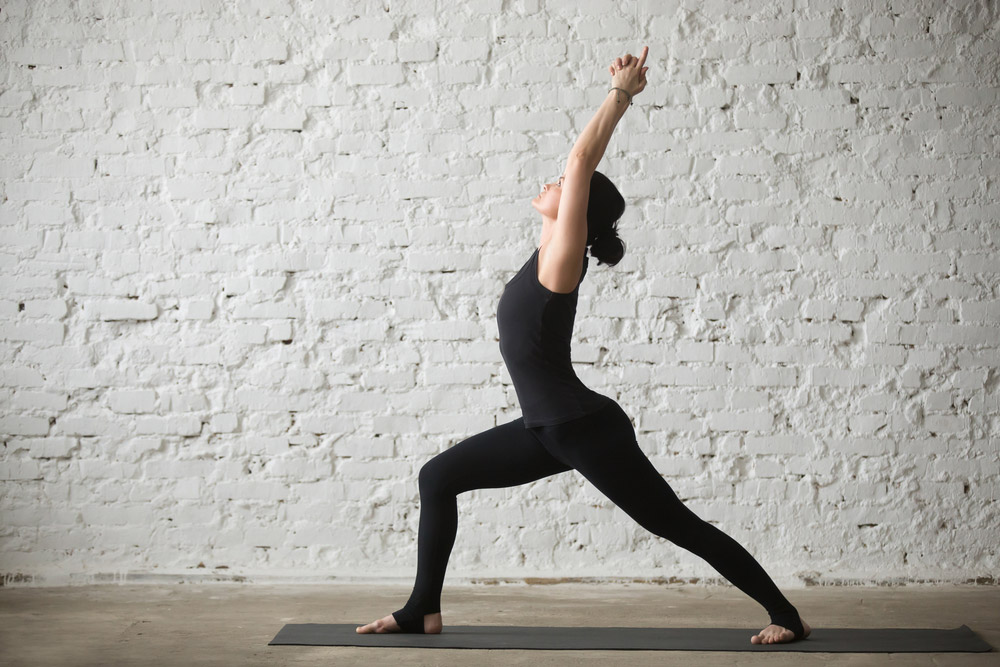
Warrior I Pose
Warrior I Pose: Step-by-Step Instructions
Once you learn the basics of Warrior I Pose, then any of the other standing poses become easier. Its full Sanskrit name is Virabhadrasana I. This pose is the first in a series of three total Warrior Pose variations.

Virabhadrasana I
(Pronounced as "VEER-ah bud-RAHS-anna")
Virabhadra was the name of the powerful warrior in the Hindu epics created by Shiva to lead his army into battle. Virabhadra symbolized the negative effects of karma that always come back to a person eventually. While practicing this posture, the yogi is summoning all their inner strength to conquer their inner demons and purify the mind.
How to do Warrior I Pose
Step One
Stand up tall on your yoga mat in Tadasana, also known as Mountain Pose. Bring your hands up in front of your chest, bend your knees and inhale.
On your exhalation, sweep your arms out to the sides and jump your feet out to the sides as far apart as you can. Adjust your feet so that the heels are in line with each other. Stretch your arms straight and hold the arms up at the same height as your shoulders.
Step Two
Raise both of your arms until they are perpendicular to the ground, holding them next to your ears with your fingertips pointing up. Pull your shoulder blades up and tuck them into your back to make sure you fully extend and lift your chest. Make sure to keep your arms straight for the rest of this posture.
Step Three
On an exhalation, rotate your torso and right leg toward the right side. Your right foot should turn out 90 degrees to the right. Turn your left foot about 45 degrees to the right. Pull your pelvis up as you lengthen your back up through your torso and your arms. Press your left heel firmly into the floor.
Step Four
Bend the right knee until your right thigh is parallel with the floor. Make sure that your right knee is exactly above your right ankle. Keep your left leg straight and push back as you extend it behind you, maintaining contact between your left heel and the floor.
Do not keep all of your body weight on your right knee; rather, distribute your weight equally between your right and left foot as you continue stretching up through your arms.
If you have enough flexibility in your shoulders, then stretch your arms a little further back and up to press your palms together. Tilt your head back and gaze up at your thumbs.
Step Five
Hold the final posture for about 20 seconds in the beginning. As you become more comfortable with the pose, you can hold it for up to a minute with steady breathing.
To come out of the pose, push more weight back on to your left leg as you straighten your right leg and slowly lower your arms. Repeat this posture on the other side, holding it for the same amount of time.
Beginner's Tip:
Pose Information
Sanskrit Name:
Virabhadrasana I
Pose Level:
Level 1
Contraindications and Cautions:
Elevated blood pressure
Heart conditions
For pregnancy: Women can practice this posture during the first trimester. After that, they should seek the guidance of an experienced yoga instructor.
If you have shoulder injuries, then you can keep your arms extended out to the sides at shoulder height rather than raising them up above your head.
If you have neck injuries, then keep your head in a neutral position and do not look up.
Modifications and Props:
When first learning this posture, it can be difficult to keep the back heel firmly anchored on the ground.
You can practice anchoring the back heel by performing this posture with your back heel against a wall so that you can push into the wall with your heel. The pressure of your heel on the wall will help you to slowly slide the heel down until it maintains solid contact with the ground.
Therapeutic Applications:
Sciatica
Recovering from old knee injuries
Benefits:
Helps people to recover from lumbago, sciatica and most types of general back pain
Builds strength in the back and abdomen
Boosts digestion
Improves the health of the reproductive organs
Stretches out tension in the chest, shoulders, neck and thighs
Variations:
You can perform this asana with your hands in several different positions. For example, you can get a deeper stretch for your wrists and elbows by doing the Namaskar mudra of pressing your palms together behind your back, which also further opens the chest.
Partnering:
Ask a partner to stand behind you. When you come into the final pose, ask them to place one hand in between your shoulder blades. With the other hand, they should pull your arms back from your elbows, one at a time.
By their pushing your shoulder blades in more and pulling the arms back from the elbows, you will get a full opening of the shoulders that will help the rest of the torso come into better alignment over your hips.